Thursday, January 5, 2012

Health. It's Time.

To all the guests that I've had stop by my page, I say a big mahalo!  I have so enjoyed blogging this past year and sharing my baked goods with you.

I have been one who has done my best to be as healthy as I knew how as far as my diabetes went.  But as I have spent the past 19 years focused on insulin, prescription changes and just trying to 'survive' I have missed out on many other things.  

Lack of energy, allergy problems, gastroparises, acid reflex, high cholesterol, migraine auras.  These are just a few of the things that I have had to learn to live with over the years on top of being insulin dependent. For the most part I just existed. Getting through another day without having some physical issue put me flat on my back yet again was my goal.

About a month and a half ago I made a decision. 
A decision that I would take control of my health and no longer just wait for the next side effect to come.

I hired a personal trainer and started exercising daily.  I have added vegetables, fruits and beans to my daily food intake and removed much of the processed, enriched and refined foods that were once a part of every meal.  Even though I was eating low-fat and watching calories, I still wasn't getting anywhere with how I felt inside.
Since I have started making these life changes I feel like a different person!  I had no idea that some 'health' foods could be so bad for you and make you feel like crap! Seriously! 

I am on this journey to learn how to improve my life through the foods I allow into my body, and exercise.  I am loving it!

So for now, until I progress further and get a better understanding of different ways to bake healthy for me and my family, I will be putting this blog on hold.  I need to focus on me.  Finally!

Again, thank you so much for your stoping by and comments.  You are the reason I have enjoyed doing this blog.

I'll meet up with you again when I am a healthier, stronger, happier me!

Starla

Saturday, December 3, 2011

Spiced Eggnog Bundt Cake

Eggnog. It is one of my favorite things about the holidays.  Seriously.
Problem is, I can't drink it too much because I am lactose intolerant. Go figure.  So I had to come up with a way to get my eggnog fix without having to go into the fridge and drink it straight from the carton.  Enter 'Spiced Eggnog Bundt Cake.'  Genius!  I searched through blogland and took a bit from this recipe and that recipe until I had something that sounded like it would address my cravings.  It did. Bigtime!

I went a little overboard with the 'drizzle' but who cares?  It tastes great!

See that swirl of spice goodness in the middle?  That my friends, is heaven on a plate!


For the Cake
1 cup of butter, softened
3 cups of sugar
6 large eggs
3 cups of sifted cake flour
3/4 teaspoon of baking powder
1/2 teaspoon of salt
1 cup of eggnog
2 teaspoons of vanilla extract
2 tablespoon of dark rum or brandy (optional)
1 teaspoon of ground cinnamon 
3/4 teaspoon of ground nutmeg
1/2 teaspoon of ground allspice 
1/4 teaspoon of ground cloves

Glaze
1 cup of sifted powdered sugar
2 tablespoons + 1 teaspoon of heavy cream or whipping cream

(I made a little extra glaze to drizzle on when serving)

Grease and flour a 12 cup bundt pan. It is important to use the larger pan or you will have issues with the cake falling (trust me on this one. I speak from experience!)  If you have a large angel food cake pan that would probably work too.

Preheat oven to 350 degrees.

Cake
In a stand mixer with a paddle attachment, beat butter on medium speed for about 2 minutes or until creamy.
Gradually add sugar, beating 5-7 minutes.
Add eggs, one at a time mixing just until yoke is incorporated.

In a separate bowl combine flour, baking powder and salt.
Add to butter and sugar mixture alternating with eggnog starting and ending with flour mixture. 
Stir on low speed just until blended after each addition.

Stir in vanilla and if desired, rum.

Pour half of the batter into the prepared pan.

Stir the cinnamon, nutmeg, allspice and cloves in the remaining batter.
Spoon spiced batter over plain batter and swirl together using a knife.

Bake for 50-55 minutes or until a wooden pick inserted in the center comes out clean.
Cool in pan for 15 minutes on a wire rack.
Remove from pan and cool on rack.

Glaze
Combine sifted powdered sugar and heavy cream.

Transfer cooled cake to a plate and pour glaze over it.

If you are like me, you will be too impatient to wait for the cake to cool completely.  If you find yourself in this predicament, you can pour the glaze over the cake while it is still warm and using a spatula, spread it over the entire cake.  After it hardens, you can use any remaining glaze to drizzle over cake when serving.


Friday, November 11, 2011

Pumpkin Lust Dessert

Nothing screams holiday like a pumpkin dessert. Pumpkin pie, pumpkin cake, pumpkin bars, pumpkin cookies, pumpkin roll, and the list goes on and on.  My husband is especially fond of anything pumpkin, so I went looking for something different than what I have made in the past.  I found it, but the most surprising thing about it is..there isn't any pumpkin in it!  Seriously.  The pumpkin flavor comes from pumpkin spice or if you can find it in your local grocery store, pumpkin spice pudding.  This has become one of my favorites!

4 layers of goodness

Nutmeg sprinkled on top gives it the perfect finish


Crust
1/2 cup of butter, melted
1 cup of flour
1 cup of chopped nuts (I used half pecans and half almonds)
2 tablespoons of sugar

 Cream Cheese Layer
8oz cream cheese, softened
1 cup of powdered sugar, sifted
1 16oz tub of cool whip, divided

Pumpkin Layer
2 small packages (3.4oz) of vanilla pudding
(if you can find the pumpkin spice pudding use that in place of the vanilla pudding)
3 cups of cold milk
1 tablespoon of pumpkin spice (if you are using vanilla pudding)
Nutmeg

Preheat oven to 375 degrees.  Spray a 9x13 pan with non stick spray or line with parchment paper.

Crust
Combine butter, flour, nuts and sugar and press in prepared pan.
Bake for 10-15 minutes. Cool completely.

Cream Cheese Layer
Beat the cream cheese, powdered sugar and 1 1/2 cups of cool whip until smooth.  Spread over cooled crust. 

Pumpkin Layer
Mix pudding mixes with cold milk. (if using pumpkin spice, mix with vanilla pudding) Mix for several minutes.  Place in fridge for 5-10 minutes to thicken.
Spread over cream cheese layer.
Top with remaining cool whip, and sprinkle with nutmeg.

Keep refrigerated.

Adapted from Sweet Treats and More


Saturday, October 22, 2011

Mint Chocolate Chip Cake

  A friend from way back, who has been creating some delicious looking baked goods agreed to be my guest blogger this week.  I appreciate Jason for posting on my humble blog!  Enjoy friends. ;-)


Ever since I was a kid, I loved chocolate mint ice cream.  I was lucky enough to find a job as a teenager at a local ice cream parlor by the name of Leatherby's here in Sacramento.  If they would have paid me in ice cream, that would have been fair in my book.  Fast forward a few, (ok, many) years and I'm still a huge fan of their ice cream.  I happened to stumble across a recipe at Raspberri Cupcakes for chocolate mint cake the other day, and my curiosity was at full alert.  Let me just say, this cake is AMAZING, especially if you're as big a fan of chocolate mint ice cream as I am.  One of my kids remarked at how similar the taste of the frosting is to real ice cream--yes, it's that close.  Give this one a try, it will be worth it!


You have two options here, as you can make a homemade cake or one from a box.  I've done the cake both ways, and I will say it's a matter of personal preference.  David Lebovitz's Devil's Food Cake is extremely rich and compliments the robust flavors of the frosting quite well.  If you're short on time, go with a box mix and enjoy the cake that much quicker!

Here's the recipe for David's Devil's Food Cake:

Cake
9 tbsp unsweetened cocoa powder
1 1/2 cups cake flour (not self-raising, I just used plain flour and replaced 3 tbsp with cornflour/cornstarch)
1 1/2 tsp salt
1 tsp bicarb soda
1/4 tsp baking powder
1 stick unsalted butter, at room temperature
1 1/2 cups caster sugar
2 large eggs, at room temperature
1/2 cup strong coffee (or water, I used a weak coffee as I didn't want it overpower the mint)
1/2 cup whole or low-fat milk

Butter and line the base of a two 9-inch cake tins (I only had a 22cm springform tin which I used for both cakes) and preheat oven to 180°C (350°F). 
Sift together the cocoa powder, flour, salt, bicarb soda, and baking powder in a bowl. Using an electric mixer with a large mixing bowl, beat together the butter and sugar about 5 minutes until smooth and creamy. Add the eggs one at a time and beat until fully incorporated.

Mix together the coffee and milk. Stir half of the dry ingredients into the butter mixture, the add the coffee and milk. Finally stir in the other half of the dry ingredients until smooth. Split batter mixture between the two prepared tins (or in my case, I used half for the first cake, baked it and then reused the tin for the other half of the batter). Bake for about 25 minutes, or until a skewer inserted into the center of the cake comes out clean. Remove from the oven and cool in tin about 5 mins, then place on a wire rack and cool completely before icing.

For the Frosting
2.5 sticks unsalted (or slightly salted) butter
4 cups powdered sugar, sifted
2-3 tsp peppermint essence or use mint extract (add 1/4 tsp at a time until you're happy with flavor)
150g dark chocolate, very finely chopped or pulsed through a food processor
Green food coloring
Optional: waffle ice cream cones to decorate


Remove the butter from fridge about half an hour before starting. Cut up butter into smaller pieces and place in a large mixing bowl. Beat with an electric mixer on high until fluffy and smooth. Add sifted powdered sugar one cup at a time, beating until combined. Add peppermint essence or mint extract to taste and green food coloring. Gradually add chocolate chip pieces until you have a good distribution of chocolate bits.


Use about 1/4 of the icing on top of one of the cakes and smooth over with a spatula. Place second cake top side down on top of the iced cake. Cover entire cake with more icing, smoothing with a spatula. I used an offset spatula, running it under hot water every now and then to help keep the surface smoother. Use the leftover icing to form scoops of icing to place on top of the cake, arranged however you like. Use mini ice cream cones or chop the ends of normal-sized cones and place on top of icing scoops. Alternatively you could cover the top with extra dark chocolate chips or shaved chocolate. Can be served immediately or stored in an airtight container overnight. Serve at room temperature.

Jason


Thursday, October 20, 2011

Chocolate Covered Brownie Bites

I love brownies.  More than cake.  More than cookies. I would give up all things sweet just to have a brownie.  And I love chocolate too.  So when I came across this recipe at Sweetapolita for chocolate covered brownies!!.. I hurried into my kitchen to give them a try.   They were worth it.  Really worth it.

Delicious little bite size brownies. Did I mention they are covered in chocolate?

These babies are rich so 1" bite size pieces are the perfect size.

Just waiting to be enjoyed.  I obliged. 

Yield approx. 35-40 1" bites

For the brownies
3/4 cup of sugar
1/3 cup of butter, cubed
2 tablespoons of water
2 cups of semisweet chocolate chips 
1 teaspoon of vanilla
2 eggs
3/4 cup of flour
1/2 teaspoon of salt
1/4 teaspoon of baking soda

For the chocolate covering
2 cups of chocolate chips
2 tablespoons of shortening
Sprinkles

Preheat oven to 325.  Line a 9" square pan with parchment paper.

In a large saucepan, bring the sugar, butter and water to a boil over medium heat.
Remove from heat and stir in 1 cup of chocolate chips and vanilla until smooth.  Cool for 5 minutes.
Add eggs, one at a time, stirring well after each addition. (I used a whisk)
In a separate bowl, combine the flour, salt and baking soda.
Stir into the chocolate mixture.
Add 1 cup of chocolate chips.
Pour into prepared pan.
Bake for 30 - 35 minutes depending on desired texture of brownies.  I like mine on the gooey side so I only left mine in for 30 minutes.
Cool completely on a wire rack.
Place in freezer for about 30 minutes just until firm enough to cut into bite size pieces.

Once the brownies are cooled, remove from pan holding onto the parchment paper.  Cut into 1" squares. (give or take) I used a pizza cutter.  It makes it so much easier..trust me!

In a microwave safe bowl, melt the chocolate chips and shortening.  I heated for 30-45 seconds then stirred and heated again until the chocolate was smooth.

Dip each brownie bite into the chocolate then place on parchment and cover in sprinkles.

Store in an airtight container in the fridge.

Enjoy!


Thursday, October 13, 2011

Rainbow Sprinkle Cake

Another month has flown by and here I am just now posting.. Eeekk! I am starting to feel like a procrastinator.  I think my inspiration has returned now that my daughters 6th birthday party is finally over.  It took a month to plan and has consumed all of my time and energy.
It was a rainbow themed party so I had to try the rainbow cake that has been floating around blogland.  I only did a 3 layer cake since we had a sweetshop bar and I knew most everyone would be too full on candy for cake, but it got eaten up and it turned out great. 

Purple, red and green were the colors we chose

Sprinkle rainbow cake


I used my Lemon Layer Cake for the cake, filling and frosting.

I divided the batter into 3 bowls (about 2 cups each) and added GEL food coloring.  Gel works best  as it makes a more vibrant color.  After coloring each of the 3 bowls of cake batter I poured them into the pans as directed in the recipe.  Follow the baking and assembly directions of the Lemon Layer cake.

When the cake is assembled add as much sprinkles as your heart desires,  I loaded mine up for the party!


Wednesday, September 14, 2011

3 layer German Chocolate Cake w/ Rum sauce

It was my dad's 60th birthday party last weekend and he requested a german chocolate cake.  Once again, I attempted to make something for a special occasion that I had never made before. I know..I'm a sucker for the unexpected..good or bad!  I was pleased with the outcome. yay me!  There is a rum sauce on each cake layer that created a very moist cake, and the ganache frosting mellowed the sweetness of the filing. A great balance all around.  This is one I will definitely be making again. 

I made some chocolate decorations for the top.  Just melt semisweet chocolate and place in a squeeze bottle or ziplock baggie.  Draw your designs, numbers, monograms etc on some wax paper and place in the freezer for 5-10 minutes until hardened.

I made a '60th' to stick on the top but my 5 year old daughter ate it before I could get a picture. ha!

Makes me want another piece.....


For the cake
I used my Chocolate espresso Cupcake mix for the cake

For the filling
2 cups of heavy cream
2 cups of sugar
6 large egg yokes
6oz unsalted butter cut into small pieces
1 teaspoon of salt
2 cups of  pecans toasted and finely chopped
2 2/3 cups of toasted coconut (sweet or unsweetened)

For the syrup
1 cup of water
3/4 cup of sugar
2 tablespoons of dark rum or rum extract

For the chocolate frosting
8oz of bittersweet or semisweet chocolate chopped. (I used both)
2 tablespoons of light corn syrup
1 1/2oz of unsalted butter
1 cup of heavy cream

Preheat oven to 350 Butter 3 8-inch pans and line with parchment paper.

CAKE
In the bowl of a stand mixer fitted with the paddle attachment, stir together the sugar, flour, cocoa, espresso, baking powder, baking soda and salt.  
Add eggs, milk, oil and vanilla.  Beat on medium speed for about 2 minutes.  
Stir in boiling water.  Batter will be thin.
Pour into prepared pans.
Bake 22-28 minutes.  (every oven cooks so differently so keep a close eye the first time you make this one) Cake is ready when a toothpick inserted in the middle comes out clean.
Cool 10 minutes then remove from pan and transfer to wire rack to cool completely. 

While the cake is cooling make the filling, syrup and frosting

FILLING                                                                                                             Mix the cream, sugar, and egg yolks in a medium saucepan. Put the 6 ounces of butter, salt, toasted coconut, and pecan pieces in a large bowl.       Heat the cream mixture on medium high and cook, stirring constantly (scraping the bottom as you stir) until the mixture begins to thicken.  Bring the heat down to medium heat halfway through process (about 15 minutes total) Filling will thicken once cooled.                                                                                                Pour the hot custard immediately into the pecan-coconut mixture and stir until the butter is melted. Cool completely to room temperature.                                                                                                                              
SYRUP                                                                                                                   In a small saucepan, heat the sugar and water until the sugar has melted. Remove from heat and stir in the dark rum. This is more syrup than you will need so you can save it or reduce the recipe.
FROSTING                                                                                                            Place the 8 ounces of chopped chocolate in a bowl with the corn syrup and 1 ½ ounces of butter.    Heat the cream until it just begins to boil. Remove from heat and pour over the chocolate. Let stand one minute, then stir until smooth.  Cool completely.   To speed up this process you can place in the fridge and stir every 10-15 minutes until desired consistency is reached.  Don't go too long without stirring or it will harden and not be spreadable. 
ASSEMBLE                                                                                                        Remove parchment paper from first layer of cake and place on a cake stand.  Using a pastry brush, spread the rum syrup over the entire cake.  Use 1/3 of the filling on the cake layer and spread to the edges.  Repeat process with the next two layers.  Using an offset spatula, frost the sides of the cake until covered.  Use any remaining frosting to pipe on cake top.    I refrigerated this cake overnight and let it set out appromimently 15 minutes before I served it.  It is good served cooled or at room temperature.  It is easier to slice when it has been chilled.
The filling, syrup and frosting came from David lebovitz


Sunday, September 4, 2011

Lemon layer cake with lemon mousse filling & vanilla bean frosting

A lemon cake for my husband's birthday.  Sounded like a great idea, except I had never made a lemon cake before.  See, I am totally one of those people that try new recipes on company, and that even rolls over into never-before-made birthday lemon cake.  Call me crazy or confident, I really don't care at the end of the day....as long as it works!  I went scouring for a recipe that got my juices flowing and finally found it at Annie's Eats  (I tend to go there often for inspiration)  I was pleased with it.  More than I thought I would be.  Another one to file away for future baking.  yay me!

The humidity was kicking my butt...so not the smooth surface I was going for. But hey, you can't win em' all!

Oh, did I mention candied lemon slices for garnish? Just call me fancy pants!..and the little flecks of vanilla bean make me happy!

Calling my name..... I totally gave in. *sigh*


For the cake
3 cups of cake flour
1 tablespoon of baking powder
1/2 teaspoon of salt
1 cup of unsalted butter at room temperature
Zest of 1/2 a lemon
2 cups of sugar
5 large eggs at room temperature 
1 1/4 cups of buttermilk at room temperature
1 tablespoon of lemon emulsion or extract
1 teaspoon of vanilla extract


For the filling
4oz COLD cream cheese
2 1/2 tablespoons of unsalted butter at room temperature 
1 1/4 cups of confectioners sugar. sifted
2 teaspoons of lemon emulsion or extract
Zest of 1/2 a lemon
1 cup of heavy cream. chilled


For the frosting
1 1/2 cups plus 2 tablespoons of unsalted butter at room temperature
3 cups of confectioners sugar. sifted
pinch of salt
1 vanilla bean split lengthwise 
1 teaspoon of vanilla extract
2 tablespoons of heavy cream


For the candied lemon slices
1 whole lemon
1 cup of sugar
1 cup of water


preheat oven to 350. butter and flour 3-8inch round baking pans.  line the bottoms with parchment paper.

To make the cake.
In a medium bowl, combine the cake flour, baking powder and salt. Whisk together and set aside.
In the bowl of a stand mixer, combine the butter and lemon zest. Beat until light in color and fluffy. about 3 minutes. scrap down the bowl halfway through.
Add the sugar to the butter mixture a 1/4 of a cup at a time, beating approximately 1 minute after each addition. 
Mix in the eggs one at a time until incorporated. Scrape down the sides after each addition.
Combine the buttermilk, lemon zest and vanilla extract in a liquid measuring cup.
With mixer on low speed, add the dry and wet ingredients alternately, starting and ending with the dry ingredients.  Mix just until incorporated. If needed, scrap down sides of bowl and mix for 15 seconds.
Divide the batter between the 3 prepared pans.
Bake 20-22 minutes or until a toothpick inserted in the center comes out clean.  If your oven cooks uneven, rotate pans 3/4 of the way into the baking process.
Cool on wire rack for 10 minutes then remove from pans and allow to cool completely.  

To make the filling
In the bowl of a stand mixer, combine the cream cheese and butter.  Beat on med/high until smooth.
Mix in the confectioners sugar on low until combined.
Mix in the lemon emulsion and lemon zest. Increase the speed to med/high and beat until light and fluffy. about 2 minutes.
Transfer the mixture to a bowl and set aside.
In the bowl of the stand mixer fitted with a whisk attachment, add the heavy cream and whip on high until stiff peaks form. Be careful not to over-beat.  
Mix about a 1/3 of the whipped cream into the cream cheese lemon mixture.
Gently fold in the remaining whipped cream until even color appears and no streaks are visible. 
Cover and keep in fridge until ready to assemble cake. If the mixture is too firm when it is time to spread on cake layers, just let it sit out for a few minutes.

To make the frosting
In the bowl of a stand mixer, fitted with a whisk attachment, whip butter on med/high until smooth. about 1 minute.
Add confectioners sugar and whip on med/low just until incorporated.  
Scrape the seeds from the vanilla bean into the mixer and add the salt.  Beat on med/high until smooth.  1-2 minutes.
Mix in the vanilla extract and heavy cream on low just until incorporated. 
Whip on high until light and fluffy.  about 4 minutes.  scrape down bowl if needed.

To make candied lemon slices
Wash and dry lemons. 
Using a sharp serrated knife, cut very thin slices.  poke out any seeds with a toothpick.
Combine water and sugar in a heavy saucepan over med/high heat.  Heat until sugar dissolves.
Add lemon slices to pan in a single layer. no overlapping.  
Reduce heat to med/low and simmer for 20 minutes. Turn slices at least once to ensure both sides are candied.
Remove from heat and store in a container with syrup until ready to use.

Assemble the cake
Level the cakes if needed.  Place the first layer on a serving platter.  Top with half of the cream cheese lemon filling. Smooth into an even layer.
Place the second cake on top of the first filling and top with the remaining filling.
Place the final layer on top.
Frost the top and side of assembled cake with the vanilla bean frosting.
If desired, use a pastry bag fitted with a decorative tip to pipe accents on the cake.
Garnish with the candied lemon slices.




Thursday, August 18, 2011

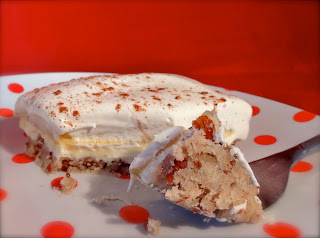
Chocolate Chip CheeseCake Cookie Bars

EeeeK!  I can't believe it has been a month since I have posted!  I have valid reasons though..really.   School started and my baby girl entered kindergarten.  That has caused an emotional roller coster for this stay at home momma.  And to add insult to injury, everything I have tried to bake has FLOPPED..seriously flopped!   So when I saw this recipe on Chef In Training I knew I was willing to take another stab at the whole baking thing that I was prepared to give up out of frustration!  
These are so worth the month wait!  I used a cookie scoop to place my cookie dough on top, but you could make smaller clumps and cover the entire cheesecake. Either way...YUMMM!

Deliciousness on a plate....

16 perfect little servings preparing to go into the oven.


Crust
1 1/2 cups of graham cracker crumbs
5 Tablespoons of unsalted butter, melted

Chocolate Chip Cookie Dough
5 Tablespoons of unsalted butter at room temperature
1/3 cup of packed light brown sugar
3 Tablespoons of granulated sugar
1/4 teaspoon of salt
1 teaspoon of vanilla extract
3/4 cup of flour
1 cup of chocolate chips

(you could also use your favorite chocolate chip cookie recipe)

CheeseCake Filling
10oz cream cheese at room temperature
1/4 cup of sugar
1 large egg at room temperature
1 teaspoon of vanilla extract


Preheat oven to 325 degrees.  Line an 8x8 inch pan with parchment paper. Allow the parchment to come up over two side of pan to use as handles.  Spray with nonstick spray


In a large bowl, combine the graham cracker crumbs and melted butter.  Place the crumb mixture into the prepared pan.  Using an offset spatula or your hands, press the crust into an even layer.  
Bake in preheated oven for 6 minutes.  Remove from oven and cool on a wire rack.

While the crust is cooling, in the bowl of a stand mixer beat the butter, brown sugar, granulated sugar, salt and vanilla until smooth. Approximately 1 minute.
On low speed, add the flour and mix just until incorporated.
Using a wooden spoon stir in the chocolate chips.
Set aside.

For the cheesecake filling, in the bowl of a stand mixer cream the cream cheese and the sugar until smooth. Mix in the egg and vanilla just until incorporated.  
Spread the filling onto the crust.
Using a cookie scoop or your hands, distribute the cookie dough over the cheesecake layer.  

Bake 28-30 minutes or until the top cookie dough layer feels dry and the cheesecake is set when gently moved.  Cool completely on a wire rack.  

I used a melted chocolate ganache to drizzle on top.

When cooled, cut into bars and store in the refrigerator. Serve cooled or at room temperature.   


Monday, July 18, 2011

Raspberry Oatmeal Bars

Raspberries....ahh my absolutely favorite berry ever.  There is just something about a sweet, tart raspberry that makes me happy.  I had a jar of raspberry preserves that was calling my name so I set out to find a recipe that would do my precious raspberries justice.  I decided to go with a bar, one of my favorite desserts.  I used an oatmeal base and really liked it, but next time I will try the crust of my caramelitas since it is one of my favorites. Either way, it's a winner in my book!


1 cup of packed light brown sugar
2 cups of flour
1/2 teaspoon of baking soda
1/4 teaspoon of salt
2 cups of rolled oats
1 cup of butter, softened
1 1/2 cups of raspberry jam (I prefer seeds but you can go seedless)

Preheat oven to 350. Grease a 9x13 pan or line with parchment paper.

In a large bowl, combine brown sugar, flour, baking soda, salt and oats.
Rub in the butter with a fork or pastry blender until crumbly and combined.
Press 3/4 of the mixture into the bottom of pan.
Spread the jam to within 1/4 inch of the edge.
Sprinkle the remaining crumb mixture on top and gently press into the jam.
Bake 35-45 minutes or until lightly browned.
Cool before cutting into bars.

I store them in my fridge to keep them firm.

Taken from All Recipes

Tuesday, July 12, 2011

Sugar Cookie Bars

My family loves sugar cookies, but I must admit there are times when messing with the cookie dough is a bit of a pain, not to mention time consuming..especially with a 4 and 5 year old at home.  Sometimes ya just gotta adapt. So when I spotted this recipe floating around blog-land I knew it could be the answer to my sugar cookie time saver!  I used the recipe from Annie's Eats.  Next time I will use a frosting that sets up a little more as I live in a humid climate and it kept melting.   

ahhhh sugar cookie goodness

can ya see the flecks of vanilla bean?... yum!

For the cookies
1 cup of unsalted butter at room temperature
2 cups of sugar
4 large eggs
2 teaspoons of vanilla extract
1 vanilla bean split lengthwise
Zest from 1 lemon (I didn't have a lemon this time around)
5 cups of flour
1 teaspoon of salt
1/2 teaspoon of baking soda


Preheat oven to 350.  Grease a rimmed baking sheet. 13x18 or 12x17

In the bowl of a stand mixer, combine the sugar and butter.  Beat on high until light and smooth.
Mix in eggs one at a time until well combined.
Beat in vanilla, seeds from vanilla bean and lemon zest.  
In a medium bowl combine flour, salt and baking soda.  Whisk together.
Add the flour mixture to the butter and sugar.  Beat just until incorporated. 

Transfer cookie dough to pan.  Press into an even layer.
Cook for 10-15 minutes until light brown and a toothpick inserted into the center comes out clean.

Transfer to wire rack and let cool completely before frosting.

For Frosting
1 cup unsalted butter, softened
1 teaspoon of vanilla extract
pinch of salt
4 cups of confectioners sugar, sifted
5 tablespoons of milk
Food coloring (optional)

Place butter in the bowl of a stand mixer and beat until light and fluffy.
Beat in vanilla, salt and sugar until smooth.
Mix in milk.
Add food coloring if desired.
Spread on cooled cookies and cut into bars.


Monday, July 4, 2011

Chocolate Swirl Banana Bread

Well, I did it again.  I bought bananas with the intention of eating them before they got the brown spots.  I personally don't like a banana after the brown spots show up.. a little too mushy for me. So I started my quest for a good banana bread.  My history with banana bread isn't the best one, but let's just blame it on the altitude at which I lived at the time.  As I clicked my way through blog after blog one finally caught my eye at The Sisters Cafe...because there was CHOCOLATE in the bread!  Woohoo now I was excited to tear into those brown spotted bananas!

mmmmm chocolate....
Super moist

2 cups of flour
3/4 teaspoon of baking soda
1/2 teaspoon of salt
1 cup of sugar
1/4 cup of butter, softened
1 1/2 cups of mashed ripe bananas (about 3 bananas) 
2 large eggs
1/3 cups of sour cream
1/2 cup of semi sweet chocolate chips

Preheat oven to 350.  Grease a loaf pan with nonstick spray.

In a medium size bowl combine flour, baking soda and salt.  Whisk 
In the bowl of a stand mixer, combine sugar and butter.  Beat until well blended.
Add banana, eggs and sour cream.  Beat until blended
Add flour mixture.  Mix just until moist and combined 

Place chocolate chips in a microwave safe bowl.  Heat for 1 minute until almost melted
Stir until smooth.  Cool slightly
Add 1 cup of batter to chocolate. Stirring until well combined

Spoon chocolate batter alternately with plain batter.
Swirl batters together using a knife.

Bake for 1 hour and 15 minutes or until wooden skewer comes out clean.
Cool on wire rack for ten minutes then remove bread from pan and cool completely.


Monday, June 27, 2011

White Texas Sheet Cake

I know the majority of my blog is filled with everything chocolate..and I don't apologize for it!  But I was feeling a little bad for my man who is a lover of white/yellow cake.  I discovered this recipe on Life as a Lofthouse and it has become the white cake base for everything I bake.  I love the almond flavor in this one.  I have to warn you though, the frosting it very sweet!  I will use a cup less of confectioners sugar the next time.  But if you love the sweet then by all means, have at it!

Moist and delicious!


A sheet cake feeds an army!


For the cake
1 cup of butter
1 cup of water
2 cup of flour
2 cups of sugar
2 eggs, beaten
1/2 cup of sour cream
1 teaspoon of almond extract
1 teaspoon of baking soda
1 teaspoon of salt

For the frosting 
1/2 cup of butter
1/4 cup of milk
4 1/2 cups of confectioners sugar, sifted
1/2 teaspoon of almond extract 
Food coloring if desired
Sprinkles 

Preheat oven to 375.  Spray a 15x10x1 baking sheet with nonstick spray.

In a small/medium sauce pan bring butter and water to a boil.
In a large mixing bowl combine flour and sugar. Whisk to combine.
Add eggs, sour cream, almond extract, baking soda and salt.  Stir until combined.  
Slowly pour in the butter/water mixture.  Stir with a  spatula until smooth.
Pour into prepared baking sheet and cook for 20-22 minutes or until golden brown.
Cool on a wire rack for 10-20 minutes before frosting. 

For the frosting
In a large saucepan bring the butter and water to a boil.
Remove from the heat and stir in the sugar and extract.  Stir until smooth.
Add food coloring if desired.
Pour over warm cake.  
Decorate with sprinkles for a little sparkle! 


Wednesday, June 22, 2011

Blondie Brownie Truffles

Have you ever went to bake something you've made a dozen times only to have a serious failure on your hands?...ya well, that was me this week.  I made (or should I say "attempted" to make) my Blondie Brownies.  Something I've done many times before.....but something happened this time around and when they came out of the oven they were extra gooey.  So much so you couldn't even cut them to have a bite!  I just couldn't justify throwing the whole batch away so I set off trying to find a recipe what I could repurpose them in.  Then it hit me.....Truffles!  I love cake pops and the concept is the same so I proceeded to take a go at it.  It worked!


Top with sprinkles, coconut, toffee, cookie crumbs or anything else you can come up with!

Ingredients 
Any brownie recipe, or you can use my Blondie Brownie recipe
Almond bark, candy coating, or chocolate chips
Toppings


Bake brownies about 5 minutes less than the recipe calls for, or when you can tell they are almost done but still gooey.
Cool completely

Break apart and place in a large bowl.  
Mix together by hand just until combined.  Don't over mix.
Using a spoon or a cookie scoop,  make 1 inch balls and place on a cookie sheet.

Melt almond bark/chocolate/candy coating in the microwave until melted. Stir often.
Using a fork, lower a brownie ball into the bark and use a spoon to cover in bark/chocolate/candy coating.
Sprinkle with any topping you desire and place on cookies sheet.
Refrigerate to harden.


Tuesday, June 14, 2011

Chocolate espresso cupcakes w/ peanut butter filling & chocolate ganache topping

I love peanut butter and chocolate together.  There is something about the creaminess of a peanut butter filling paired with the moist chocolate cake that makes me happy.  Now add a chocolate ganache to that and you have a winner in my book!  I made some of these with the peanut butter filling on on the inside and some with it on top.  You really can't lose either way!


The cake

2 cups of sugar
1 3/4 cups of all-purpose flour
3/4 cup of cocoa
1 tablespoon of espresso powder
1 1/2 teaspoons of baking powder
1 1/2 teaspoons of baking soda
1 teaspoon of salt
2 eggs
1 cup of milk
1/2 cup vegetable oil
2 teaspoons of vanilla extract 
1 cup of boiling water

Preheat oven to 350 degrees.  Line cupcake pan with cupcake liners.


In the bowl of a stand mixer fitted with the paddle attachment, stir together the sugar, flour, cocoa, espresso powder, baking powder, baking soda and salt.  
Add eggs, milk, oil and vanilla.  Beat on medium speed for about 2 minutes.  
Stir in boiling water.  Batter will be thin.
Pour into cupcake liners. Fill about 2/3rds of the way.
Bake 14 to 18 minutes or until a toothpick inserted in the center comes out clean.
Cool 10 minutes then remove cupcakes from pan and transfer to wire rack to cool completely.

For the filling 
1 1/4 cups of peanut butter
1/2 cup of butter, softened
1 1/2 cups of confectioners sugar
3 tablespoons of heavy cream or as much as needed

In the bowl of a stand mixer, beat the peanut butter and butter until completely mixed. It will be creamy.  Gradually add the confectioners sugar while beating on slow speed. After confectioners sugar is incorporated start adding the heavy cream until desired consistency is achieved. 

Ganache Topping
2 cups of chocolate chips
1/2 cup of shortening
6 tablespoons of corn syrup
4 1/2 tablespoons of water

Combine the chocolate chips, shortening, corn syrup and water in the top of a double broiler. Heat, stirring frequently until melted and smooth.  Remove from heat and let cool and thicken slightly before topping cupcakes.


Assemble 
With a paring knife, cut out the center of the cupcakes and set the removed piece aside.  Put the peanut butter filling in a piping bag or a ziplock with the corner snipped off.  Pipe the filling into the cupcake until just about full and replace the removed piece of cake.  Dip the filled cupcake in the ganache. If it is too difficult to dip, use a wooden spoon to scoop the ganache on top of the cupcake and spread until covered and smooth.


Top with sprinkles if desired.

Alternate way.
Pipe peanut butter filling on top of cupcake and spoon ganache on top of peanut butter.

Makes approximately  24-30 cupcakes